One of the biggest UX enhancements unlocked by Smart Wallet is the ability for app developers to sponsor their users’ transactions. If your app supports Smart Wallet, you can start sponsoring your users’ transactions by using standardized Paymaster service communication enabled by new wallet RPC methods.

This guide is specific to using Smart Wallet, you can find our more about using Paymasters with Base in the Base Go Gasless page.

The code below is also in our Wagmi Smart Wallet template.

Skip ahead and clone the template

If you are looking for a complete example, you can skip the steps below and clone the Wagmi Smart Wallet template. Simply open a terminal and run:

git clone https://github.com/wilsoncusack/wagmi-scw.git

Follow the instructions in the README to install the dependencies and run the app.

Add Support in your Next.js app (using Wagmi/Viem)

1

Set up your Paymaster service

As a prerequisite, you’ll need to obtain a Paymaster service URL from a Paymaster service provider.

We’ll use Coinbase Developer Platform as a Paymaster service provider, currently offering up to $15k in gas credits as part of the Base Gasless Campaign.

ERC-7677-Compliant Paymaster Providers

If you choose to use a different Paymaster service provider, ensure they are ERC-7677-compliant.

Once you have signed up for Coinbase Developer Platform, you get your Paymaster service URL by navigating to Onchain Tools > Paymaster as shown below:

Should you create a proxy for your Paymaster service?

As you can see in the Paymaster transaction component, we use a proxy to protect the Paymaster service URL to prevent it from being exposed/leaked on a frontend client

For local development, you can use the same URL for the Paymaster service and the proxy.

We also created a minimalist proxy API which you can use as the PaymasterServiceUrl in the TransactWithPaymaster component.

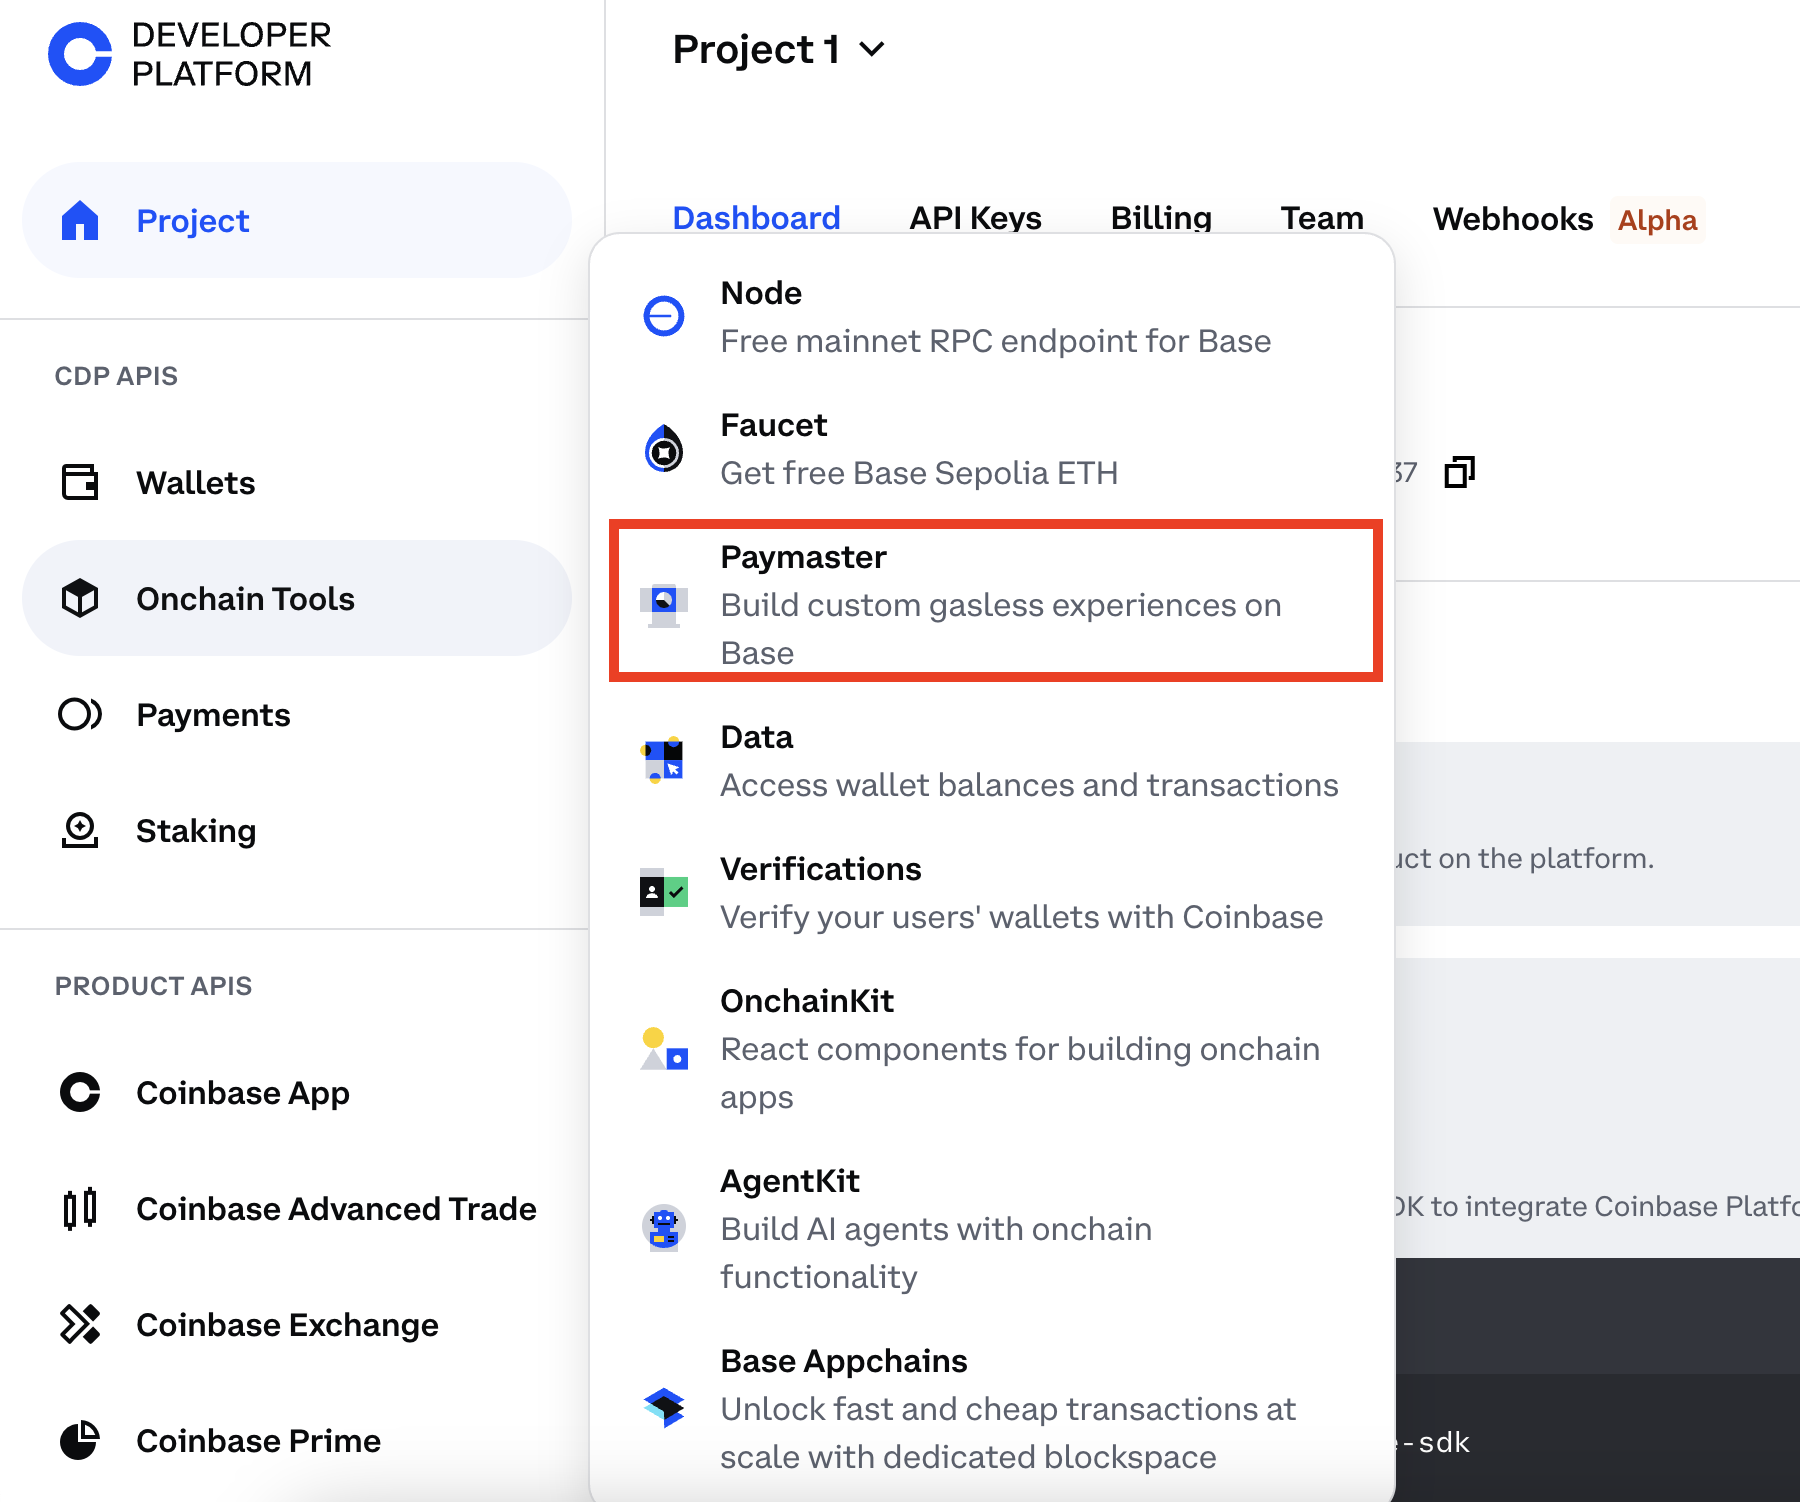
Once you have your Paymaster service URL, you can proceed to setting up your contracts allowlist. This is a list of contracts and function calls that you want to be sponsored by the Paymaster.

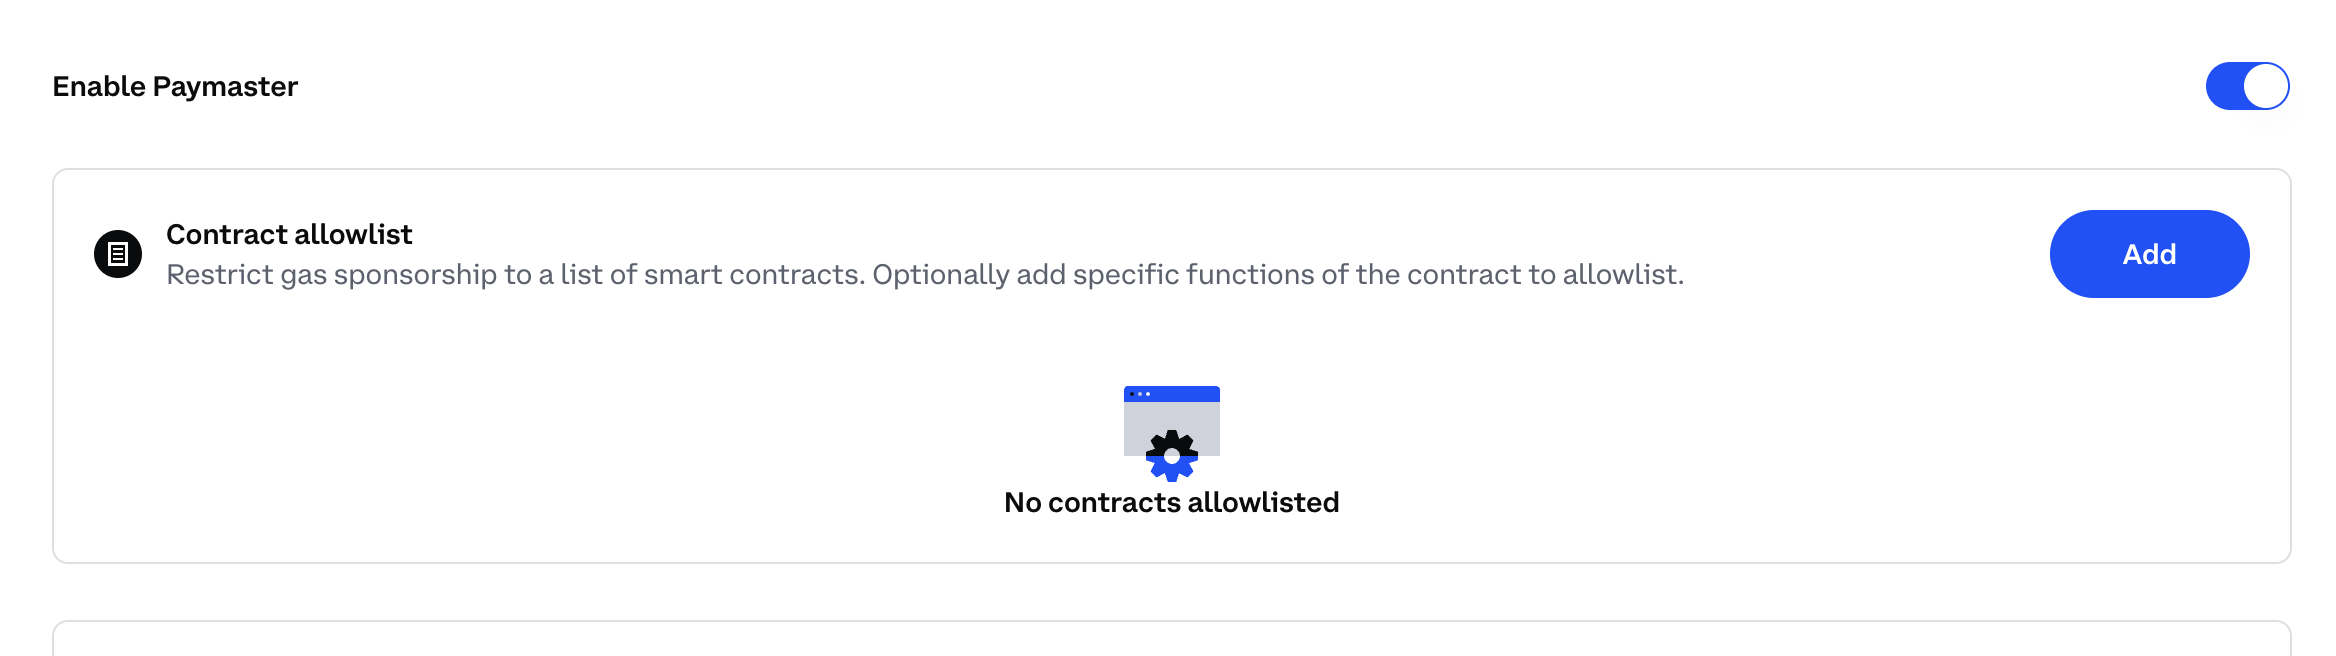
Congrats! You’ve set up your Paymaster service and contracts allowlist. It’s time to create Wagmi and Viem clients.

You can also choose to create custom advanced policies !

For example, in the template, we create a willSponsor function in utils.ts to add some extra validation if you need more control over the policy enforcement.

willSponsor is most likely not needed if you are using Coinbase Developer Platform as it has built-in policy enforcement features, but know that this is still possible if you need it.

2

Create Wagmi and Viem clients

This section shows you how to create Wagmi and Viem clients to interact with Smart Wallet using the Paymaster service you set up in the previous steps.

// @noErrors
import { http, createConfig } from "wagmi";
import { baseSepolia } from "wagmi/chains";
import { coinbaseWallet } from "wagmi/connectors";

export const cbWalletConnector = coinbaseWallet({
  appName: "Wagmi Smart Wallet",
  preference: "smartWalletOnly",
});

export const config = createConfig({
  chains: [baseSepolia],
  // turn off injected provider discovery
  multiInjectedProviderDiscovery: false,
  connectors: [cbWalletConnector],
  ssr: true,
  transports: {
    [baseSepolia.id]: http(),
  },
});
3

Send EIP-5792 requests with a Paymaster service capability

Once you have your Paymaster service set up, you can now pass its URL along to Wagmi’s useWriteContracts hook.

Pass in the proxy URL

If you set up a proxy in your app’s backend as recommended in step (2) above, you’ll want to pass in the proxy URL you created.

// @noErrors
import { useAccount } from "wagmi";
import { useCapabilities, useWriteContracts } from "wagmi/experimental";
import { useMemo, useState } from "react";
import { CallStatus } from "./CallStatus";
import { myNFTABI, myNFTAddress } from "./myNFT";

export function App() {
  const account = useAccount();
  const [id, setId] = useState<string | undefined>(undefined);
  const { writeContracts } = useWriteContracts({
    mutation: { onSuccess: (id) => setId(id) },
  });
  const { data: availableCapabilities } = useCapabilities({
    account: account.address,
  });
  const capabilities = useMemo(() => {
    if (!availableCapabilities || !account.chainId) return {};
    const capabilitiesForChain = availableCapabilities[account.chainId];
    if (
      capabilitiesForChain["PaymasterService"] &&
      capabilitiesForChain["PaymasterService"].supported
    ) {
      return {
        const PaymasterServiceUrl = process.env.NEXT_PUBLIC_PAYMASTER_PROXY_SERVER_URL
        PaymasterService: {
          url: PaymasterServiceUrl // You can also use the minimalist proxy we created: `${document.location.origin}/api/Paymaster`
        },
      };
    }
    return {};
  }, [availableCapabilities, account.chainId]);

  return (
    <div>
      <h2>Transact With Paymaster</h2>
      <p>{JSON.stringify(capabilities)}</p>
      <div>
        <button
          onClick={() => {
            writeContracts({
              contracts: [
                {
                  address: myNFTAddress,
                  abi: myNFTABI,
                  functionName: "safeMint",
                  args: [account.address],
                },
              ],
              capabilities,
            });
          }}
        >
          Mint
        </button>
        {id && <CallStatus id={id} />}
      </div>
    </div>
  );
}

About The Hooks Used Above

The useWriteContracts and useCapabilities hooks used below rely on new wallet RPC and are not yet supported in most wallets. It is recommended to have a fallback function if your app supports wallets other than Smart Wallet.

How to find this code in the repository?

The code above is a simplified version of the code in the template.

In the template, we create a TransactWithPaymaster component that uses the useWriteContracts hook to send a transaction with a Paymaster.

The TransactWithPaymaster component is used in the page.tsx file.

That’s it! Smart Wallet will handle the rest. If your Paymaster service is able to sponsor the transaction, in the UI Smart Wallet will indicate to your user that the transaction is sponsored.