This Paymaster quickstart tutorial explains how to submit your first smart account transaction on Base Sepolia using Viem, with gas sponsorship from Coinbase Developer Platform. The example below sponsors an NFT mint, but can be updated to call your smart contract instead.
Prerequisites
node >= 14.0.0
npm >= 6.0.0Getting an endpoint on Base Sepolia
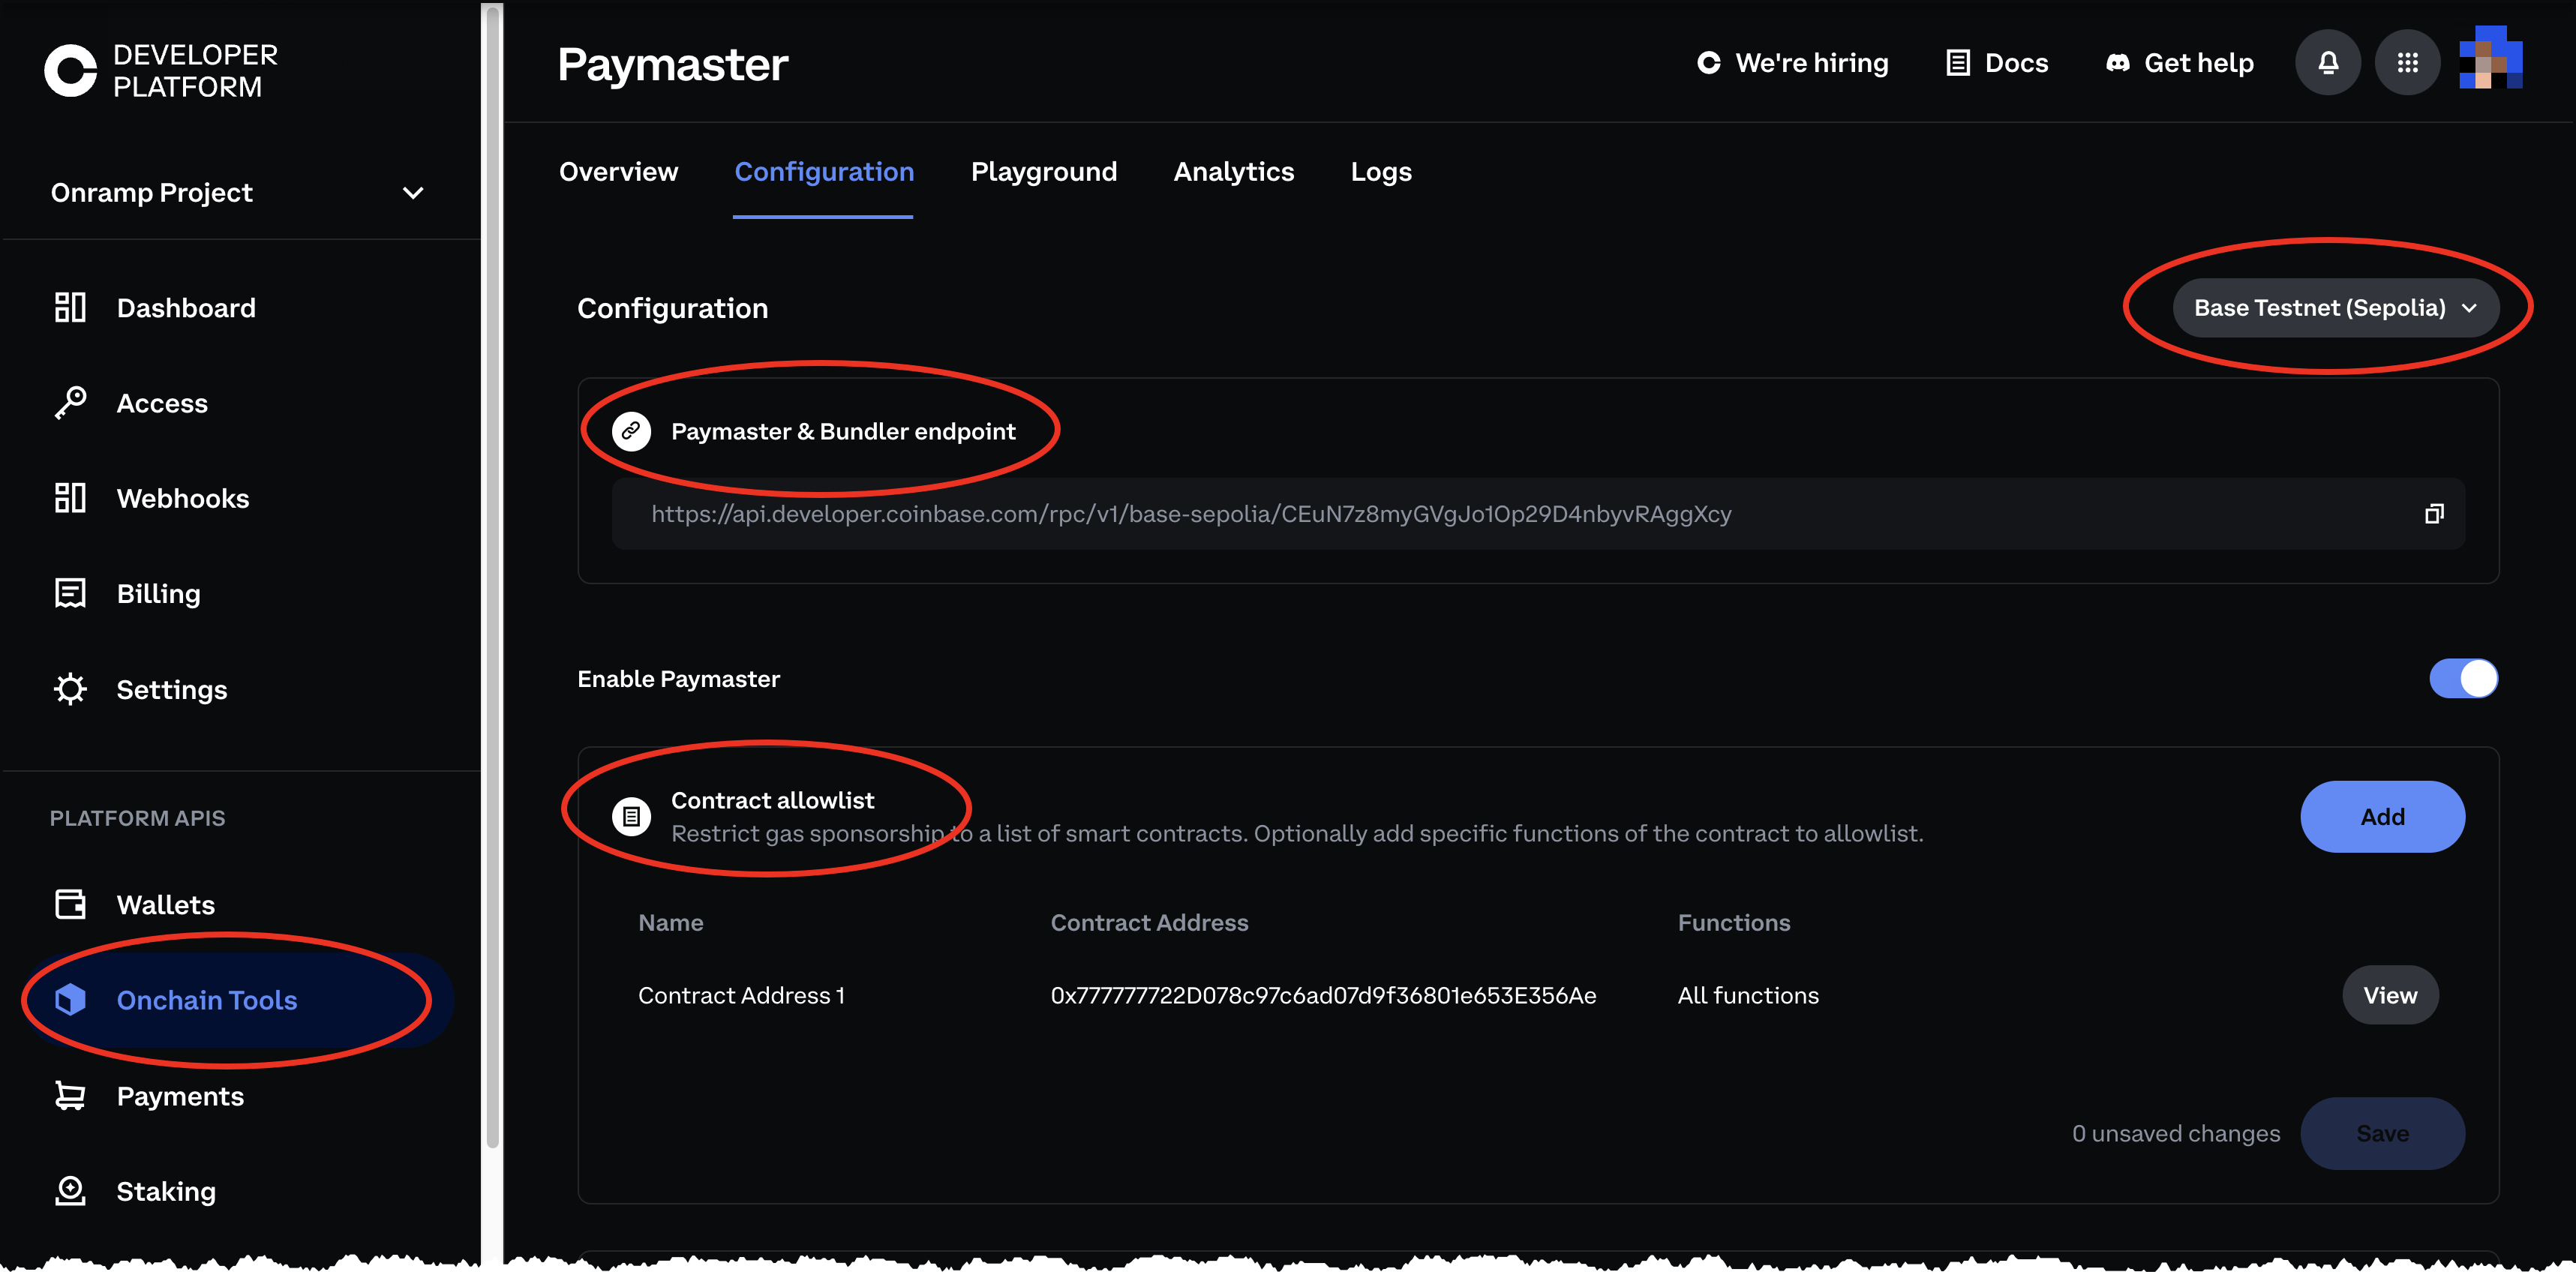
How to Get a Paymaster & Bundler endpoint on Base testnet (Sepolia) from CDP
- Create a new CDP account or sign in to your existing account.
- Navigate to Paymaster.
- The address of the NFT contract we are calling is
0x66519FCAee1Ed65bc9e0aCc25cCD900668D3eD49, add that to the contract allowlist and save the policy. - Switch to Base testnet (Sepolia) in the top right of the configuration.
- Copy your endpoint to use later.
Expand for images and click to enlarge

Sending a transaction
How to call the mint function of a Base Sepolia NFT contract (or contract of choice)1. Initialize your project
In your terminal, create a directory called paymaster-tutorial and initialize a project using npm.
mkdir paymaster-tutorial
cd paymaster-tutorial
npm init es62. Download dependencies
- Install
viem.
npm install viem3. Create smart account using a private key
The example below uses Coinbase smart wallet, but any smart account will work.
a. Create a new private key with Foundry.
b. Install Foundry: curl -L https://foundry.paradigm.xyz | bash
c. Generate a new key pair: cast wallet new.
d. Update your config.js file with the private key and create the account.
//config.js
import { createPublicClient, http } from 'viem';
import { toCoinbaseSmartAccount } from 'viem/account-abstraction';
import { baseSepolia } from 'viem/chains';
import { privateKeyToAccount } from 'viem/accounts';
// Your RPC url. Make sure you're using the right network (base vs base-sepolia)
export const RPC_URL = 'https://api.developer.coinbase.com/rpc/v1/base-sepolia/<your-rpc-token>';
export const client = createPublicClient({
chain: baseSepolia,
transport: http(RPC_URL),
});
// Creates a Coinbase smart wallet using an EOA signer
const owner = privateKeyToAccount('<your-private-key>');
export const account = await toCoinbaseSmartAccount({
client,
owners: [owner],
});4. Add your smart contract's ABI
Create a file called example-app-abi.js to store our NFT contract's abi and address. You will have to update this to your smart contract's ABI.
//example-app-abi.js
export const abi = [
{
inputs: [
{ internalType: 'address', name: 'recipient', type: 'address' },
{ internalType: 'uint16', name: 'item', type: 'uint16' },
],
name: 'mintTo',
outputs: [{ internalType: 'uint256', name: '', type: 'uint256' }],
stateMutability: 'payable',
type: 'function',
},
];5. Create the Bundler and Paymaster clients, submit transaction
Create a new file called index.js
//index.js
import { http } from 'viem';
import { baseSepolia } from 'viem/chains';
import { createBundlerClient } from 'viem/account-abstraction';
import { account, client, RPC_URL } from './config.js';
import { abi } from './example-app-abi.js';
// Logs your deterministic public address generated by your private key
console.log(`Minting nft to ${account.address}`);
// The bundler is a special node that gets your UserOperation on chain
const bundlerClient = createBundlerClient({
account,
client,
transport: http(RPC_URL),
chain: baseSepolia,
});
// The call for your app. You will have change this depending on your dapp's abi
const nftContractAddress = '0x66519FCAee1Ed65bc9e0aCc25cCD900668D3eD49';
const mintTo = {
abi: abi,
functionName: 'mintTo',
to: nftContractAddress,
args: [account.address, 1],
};
const calls = [mintTo];
// Pads the preVerificationGas (or any other gas limits you might want) to ensure your UserOperation lands onchain
account.userOperation = {
estimateGas: async (userOperation) => {
const estimate = await bundlerClient.estimateUserOperationGas(userOperation);
// adjust preVerification upward
estimate.preVerificationGas = estimate.preVerificationGas * 2n;
return estimate;
},
};
// Sign and send the UserOperation
try {
const userOpHash = await bundlerClient.sendUserOperation({
account,
calls,
paymaster: true,
});
const receipt = await bundlerClient.waitForUserOperationReceipt({
hash: userOpHash,
});
console.log('✅ Transaction successfully sponsored!');
console.log(
`⛽ View sponsored UserOperation on blockscout: https://base-sepolia.blockscout.com/op/${receipt.userOpHash}`,
);
console.log(
`🔍 View NFT mint on basescan: https://sepolia.basescan.org/address/${account.address}`,
);
process.exit();
} catch (error) {
console.log('Error sending transaction: ', error);
process.exit(1);
}In your terminal you can run this script using the below command from the correct directory
node index.jsNext steps
Modify your allowlist and gas policy to ensure you only sponsor what you want!
Other examples
Coinbase Smart wallet examples can be found on our other quickstart guide or on smartwallet.dev.
Examples for integrations with other common SDKs can be found here paymaster-bundler-examples.
Troubleshooting
If you run into any errors with this tutorial, please check out our troubleshooting guide.