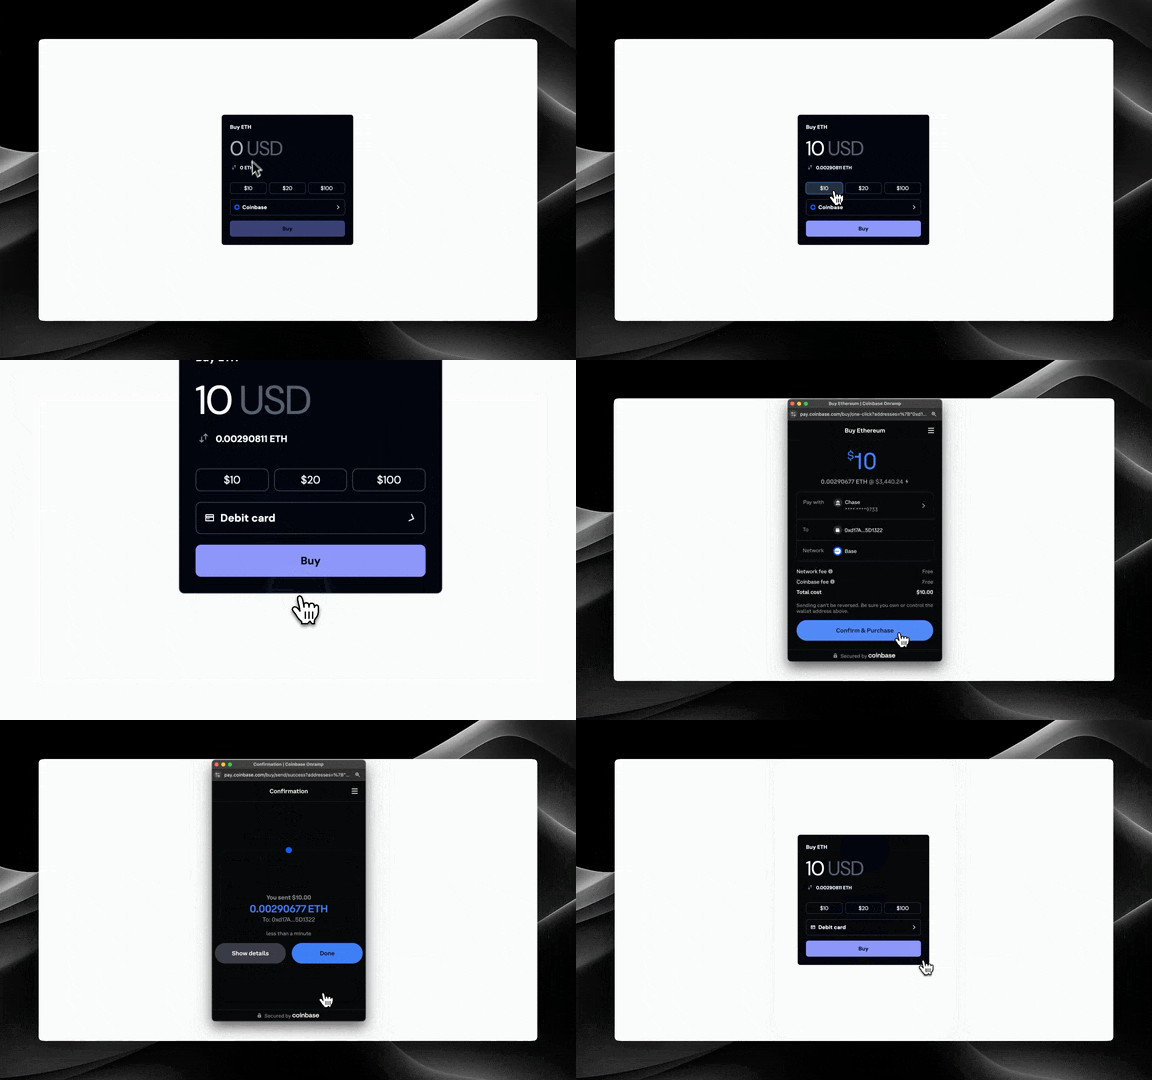
The <FundCard /> component provides a complete fiat onramp experience within your app. It includes:
- Amount input with fiat/crypto switching
- Payment method selection (Coinbase, Apple Pay, Debit Card)
The Apple Pay and Debit Card onramp options are only available for Coinbase
supported assets.
- Automatic exchange rate updates
- Smart handling of payment method restrictions (based on country and subdivision)
Session Token Required: This utility requires a session token generated on your backend server using your CDP API keys. The session token encapsulates user addresses, supported assets, and client IP.Note: Restricting assets and addresses are done during session token creation on your backend.See Session Token Authentication for implementation details. To use the FundCard component, you’ll need to provide a Client API Key in
OnchainKitProvider. You can get one following our Getting
Started steps.This component requires a projectId to be set in the OnchainKitProvider.
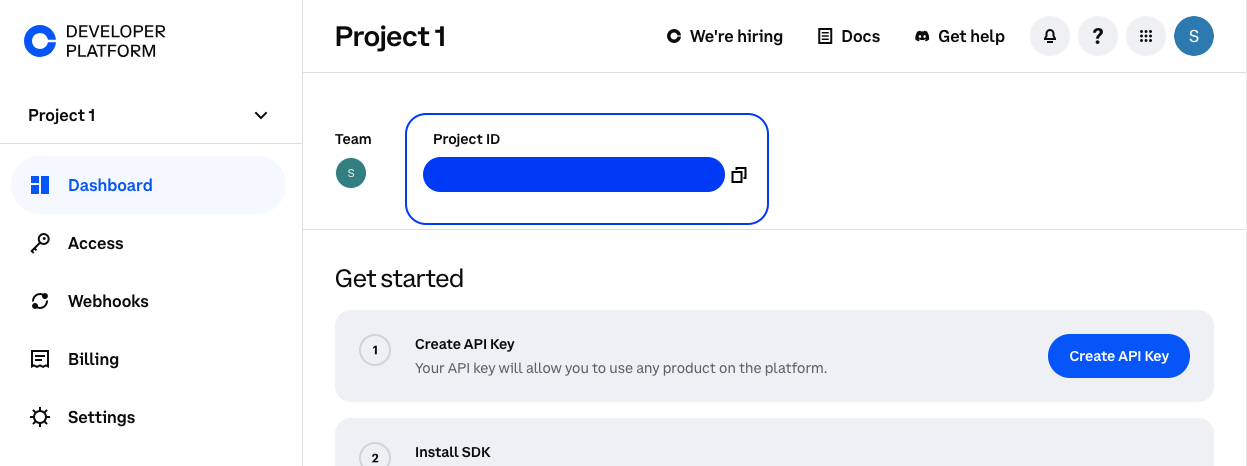
You can find your projectId on Coinbase Developer
Platform. Walkthrough
Get your Project ID
- Get your Project ID from the Coinbase Developer Platform Dashboard.
- Add your Project ID to your
.env file.
NEXT_PUBLIC_ONCHAINKIT_API_KEY = YOUR_PUBLIC_API_KEY;
NEXT_PUBLIC_CDP_PROJECT_ID = YOUR_CDP_PROJECT_ID;
Add Project ID to OnchainKitProvider
<OnchainKitProvider
  apiKey={process.env.NEXT_PUBLIC_ONCHAINKIT_API_KEY}
  projectId={process.env.NEXT_PUBLIC_CDP_PROJECT_ID}
  chain={base}
>
  {props.children}
</OnchainKitProvider>
Drop in the <FundCard /> component
import { FundCard } from '@coinbase/onchainkit/fund';

const sessionToken = "YOUR_SESSION_TOKEN";

<FundCard
  sessionToken={sessionToken}
  assetSymbol="ETH"
  country="US"
  currency="USD"
/>
Customization
Custom Header and Button Text
You can customize the header and button text:
<FundCard
  sessionToken={sessionToken}
  assetSymbol="ETH"
  country="US"
  currency="USD"
  headerText="Purchase Ethereum"
  buttonText="Purchase"
/>
Custom Currency
You can specify which fiat currency to use:
<FundCard
  sessionToken={sessionToken}
  assetSymbol="ETH"
  country="GB"
  currency="GBP"
/>
const presetAmountInputs = ["10", "20", "50"] as const;

<FundCard
  sessionToken={sessionToken}
  assetSymbol="ETH"
  country="US"
  currency="USD"
  presetAmountInputs={presetAmountInputs}
/>;
Note: 3 preset amount inputs are required in order to show the preset amount
buttons.
Custom Content
You can provide custom children to completely customize the card content while keeping the fund button functionality:
<FundCard
  sessionToken={sessionToken}
  assetSymbol="ETH"
  country="US"
  currency="USD"
>
  <div className="space-y-4">
    <h2>Custom Header</h2>
    <input type="number" placeholder="Enter amount" />
    <select>
      <option>Payment Method 1</option>
      <option>Payment Method 2</option>
    </select>
  </div>
</FundCard>
import {
  FundCardHeader,
  FundCardAmountInput,
  FundCardAmountInputTypeSwitch,
  FundCardPresetAmountInputList,
  FundCardPaymentMethodDropdown,
  FundCardSubmitButton,
} from "@coinbase/onchainkit/fund";

<FundCard
  sessionToken={sessionToken}
  assetSymbol="ETH"
  country="US"
  currency="USD"
>
  <h2>Custom Header instead of the default "FundCardHeader" </h2>
  <FundCardAmountInput />
  <FundCardAmountInputTypeSwitch />
  <FundCardPresetAmountInputList />
  <div>Any custom content</div>
  <FundCardPaymentMethodDropdown />
  <FundCardSubmitButton />
  <div>Any custom content</div>
</FundCard>;
Note: If you are using the custom components then you are going to need to
access the state of the FundCard component. You can do this by using the
useFundContext hook.
const {
  asset,
  currency,
  selectedPaymentMethod,
  setSelectedPaymentMethod,
  fundAmountFiat,
  setFundAmountFiat,
  fundAmountCrypto,
  setFundAmountCrypto,
  selectedInputType,
  setSelectedInputType,
  exchangeRate,
  setExchangeRate,
  exchangeRateLoading,
  setExchangeRateLoading,
  submitButtonState,
  setSubmitButtonState,
  paymentMethods,
  setPaymentMethods,
  isPaymentMethodsLoading,
  setIsPaymentMethodsLoading,
  headerText,
  buttonText,
  country,
  subdivision,
  lifecycleStatus,
  updateLifecycleStatus,
  presetAmountInputs,
  sessionToken,
} = useFundContext();
Props
FundCardProps
type FundCardProps = {
  children?: ReactNode;
  /** Required session token for authentication */
  sessionToken: string;
  assetSymbol: string;
  placeholder?: string | React.ReactNode;
  headerText?: string;
  buttonText?: string;
  country: string;
  subdivision?: string;
  currency?: string;
  className?: string;
  presetAmountInputs?: PresetAmountInputs;
} & LifecycleEvents;
type FundCardSubmitButtonProps =
  | {
      render?: (props: {
        state: "default" | "success" | "error" | "loading";
        onClick: () => void;
        disabled: boolean;
      }) => React.ReactNode; // Custom render function for complete control of submit button rendering
      children?: never;
    }
  | {
      render?: never;
      children?: ReactNode;
    };

