This Paymaster quickstart tutorial explains how to set up a basic app and sponsor transactions using OnchainKit and Coinbase Smart Wallet.
Getting an endpoint on Base Sepolia
How to Get a Paymaster & Bundler endpoint on Base testnet (Sepolia) from CDP
-
Create a new CDP account or sign in to your existing account.
-
Navigate to Paymaster.
-
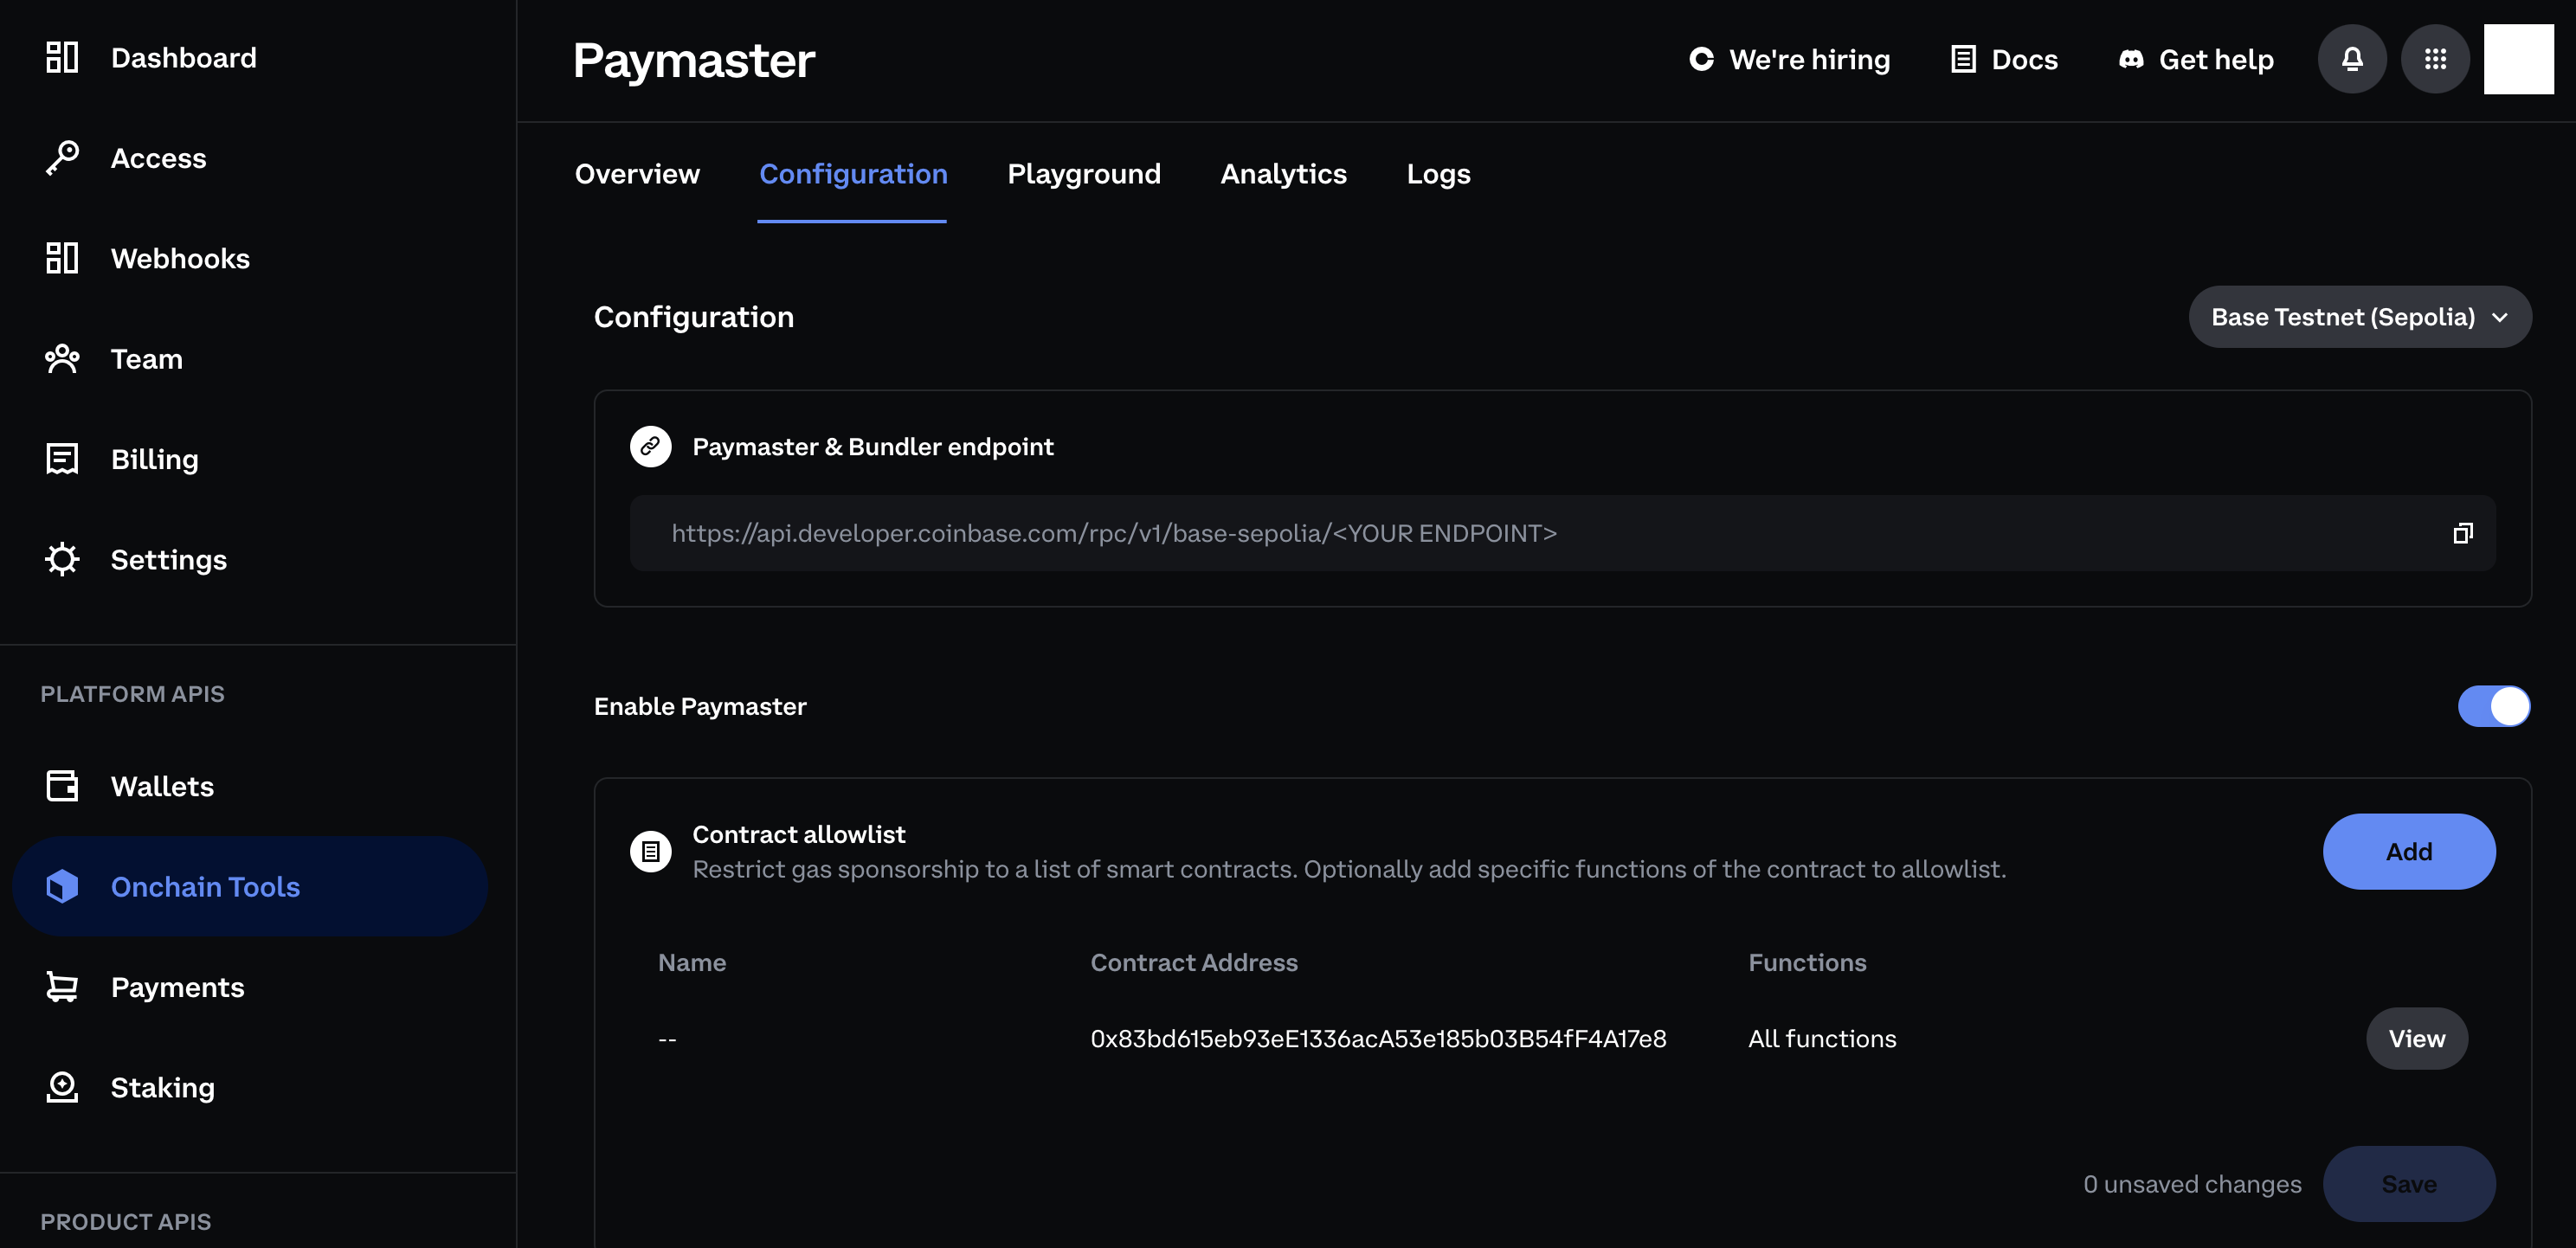
Add the following address to the allowlist under Configuration—this is the address of the contract we are calling:
0x67c97D1FB8184F038592b2109F854dfb09C77C75
-
Switch to Base testnet (Sepolia) in the top right of the configuration.
-
Copy your endpoint to use later.
Expand for images and click to enlarge

Setting up an app template
Clone the repo
git clone https://github.com/coinbase/onchain-app-template.git
cd onchain-app-template
You can find the API key on the Coinbase Developer Portal's OnchainKit page. If you don't have an account, you will need to create one.
You can find your Wallet Connector project ID at Wallet Connect.
Add the following to your .env
file
NEXT_PUBLIC_PAYMASTER_AND_BUNDLER_ENDPOINT = ADD_YOUR_PAYMASTER_URL_HERE;
NEXT_PUBLIC_CDP_API_KEY = ADD_YOUR_ONCHAINKIT_KEY_HERE;
NEXT_PUBLIC_WC_PROJECT_ID = ADD_YOUR_PROJECT_ID_HERE;
Install dependencies - run these in your terminal in the root of the project
# Install bun in case you don't have it
bun curl -fsSL <https://bun.sh/install> | bash
# Install packages
bun i
Add your paymaster to the transact button
Navigate to /src/components/TransactionWrapper.tsx
and modify the Transaction component to include the paymaster service.
<Transaction
address={address}
contracts={contracts}
className="w-[450px]"
chainId={BASE_SEPOLIA_CHAIN_ID}
onError={handleError}
onSuccess={handleSuccess}
// Paymaster capabilities added below
capabilities={{
paymasterService: {
url: process.env.NEXT_PUBLIC_PAYMASTER_AND_BUNDLER_ENDPOINT!,
},
}}
>
<TransactionButton
className="mt-0 mr-auto ml-auto w-[450px] max-w-full text-[white]"
text="Collect"
/>
<TransactionStatus>
<TransactionStatusLabel />
<TransactionStatusAction />
</TransactionStatus>
</Transaction>
Start the app locally
bun run dev
Open the app in your browser and sign in with a smart wallet
Navigate to http://localhost:3000
Click connect and sign in with your smart wallet or create a new one.
Initiate the transaction
Click the "Collect" button and your paymaster will sponsor. Note only Smart Wallets can have sponsored transactions so EOA accounts will not get sponsorship.
Thats it! You've successfully set up your paymaster on your application.
Other Examples
Additional documentation and information on Coinbase Smart Wallet is at smartwallet.dev.
Check out how to build onchain applications with ease using OnchainKit!