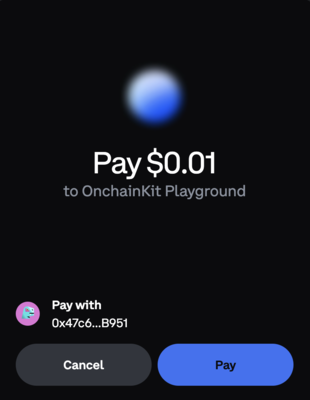
Checkout component provides a one-click checkout experience for onchain commerce - all for free.
Our all-in-one solution simplifies payment processing for onchain developers, removing complex integrations, high fees, and onboarding friction. Whether you’re selling digital goods, services, or in-game items, this tool is for you.
Features
- Plug-and-Play Integration: Add our
Checkoutbutton with just a few lines of code. No backend required. - Seamless Onboarding: Support Passkey wallets to eliminate onboarding drop-offs.
- Real-time Merchant Tooling: Get instant payment tracking, analytics, and reporting.
- Dynamic Payment Flows: Generate charges on the fly, handle variable pricing, and pass in custom metadata.
Prerequisites
Before using theCheckout component, ensure you’ve completed the Getting Started steps.
To use the
Checkout component, you’ll need to provide a Client API Key in OnchainKitProvider. You can get one following our Getting Started steps.Starting a new project
If you’re starting a new project, we recommend usingcreate onchain to scaffold your project.
Adding to an existing project
If you’re addingCheckout to an existing project, simply install OnchainKit.
<OnchainKitProvider /> around your app, following the steps in Getting Started.
Quickstart
Option 1: Simple Product Checkout
Ideal for fixed-price items. Get started with minimal setup.1
Sign up for a Coinbase Commerce account
Head to Coinbase Commerce and sign up. This is where you’ll manage transactions, view reports, and configure payments.
2
Create a product and copy the productId
In the Coinbase Commerce dashboard, create a new product and copy the
productId.3
Import the component
Option 2: Dynamic Charges
For variable pricing, custom metadata, or multi-product checkouts, use backend-generated charges.1
Sign up for a Coinbase Commerce account
Head to Coinbase Commerce and sign up. This is where you’ll manage transactions, view reports, and configure payments.
2
Create a Coinbase Commerce API Key
In the Coinbase Commerce dashboard, create a new API Key under
Security in Settings.3
Set up a backend to create charges dynamically using the Coinbase Commerce API
See Using chargeHandler for a code example.
4
Pass the chargeID into Checkout via the chargeHandler prop
Usage
Configuring a checkout
Using productId
You can create products on the Coinbase Commerce Portal and use them in the Checkout component through the productId prop.
Using chargeHandler
Alternatively, you can create charges dynamically using the Coinbase Commerce API Create Charge endpoint by passing the chargeID into Checkout via the chargeHandler prop.
This function must have the signature () => Promise<string> and must return a valid chargeId created by the create charge endpoint.
To create charges, you’ll need a Coinbase Commerce API Key.
⚠️ WarningYou should protect your Coinbase Commerce API Key by only creating charges server-side.
productId and chargeHandler are mutually exclusive and only one can be provided as a prop to Checkout.
Handling a successful checkout
To handle successful checkouts, use theonStatus prop to listen for the success callback.
This callback will return a LifecycleStatusData object including the TransactionReceipt and chargeId.
For idempotent actions, like rendering your own success screen, you can simply check that the statusName is equal to success.
For non-idempotent actions, like order fulfillment, we recommend one of the following approaches to verify a charge has been fully paid.
- (Recommended) Check the status of the
chargeIdusing the Coinbase Commerce API. - Set up a Coinbase Commerce Webhook which will notify you for successful payments.
To verify charges, you’ll need a Coinbase Commerce API Key.
⚠️ WarningYou should protect your Coinbase Commerce API Key by verifying charges server-side. This client-side code is only provided as an example.
Viewing successful checkouts
You can view successful checkouts on the Coinbase Commerce Merchant Dashboard.
Customization
Add name and logo
To customize the name and logo of your application rendered in the popup, set thename and logo values inside OnchainKitProvider.
providers.tsx
Add Coinbase branding
You can add Coinbase branding to the component by using thecoinbaseBranded prop on CheckoutButton.
Disabling the button
You can disable the button using thedisabled prop on CheckoutButton.
Customize button
You can customize the button text using thetext prop on CheckoutButton.
Override styles
We recommend style customization by setting a custom OnchainKit theme. You can also override individual component styles usingclassName.
Advanced Usage
Listening to the component lifecycle
You can use our CheckoutLifecycleStatus and the onStatus prop to listen to transaction states.
Example use cases
- Demand-based pricing: Allow users to select seats or ticket types for events, and dynamically calculate charges based on availability and demand.
- Product bundles: Provide users with the option to create custom product bundles, applying discounts or special pricing based on the selected items.
- Freelance Services: Allow clients to specify project details such as hours, deliverables, and deadlines, and generate charges based on these custom inputs.
Components
The components are designed to work together hierarchically. For each component, ensure the following:<Checkout />- Sets theproductIdorchargeHandlerprop.<CheckoutButton />- Branding and customization of the payment button.<CheckoutStatus />- The status of the payment.