What are Sub Accounts?
Sub Accounts allow you to provision app-specific wallet accounts for your users that are embedded directly in your application. Once created, you can interact with them just as you would with any other wallet via the wallet provider or popular onchain libraries like wagmi and viem.Looking for a full implementation? Jump to the Complete Integration Example.
Key Benefits
- Frictionless transactions: Eliminate repeated signing prompts for high frequency and agentic use cases or take full control of the transaction flow.
- No funding flows required: Spend Permissions allow Sub Accounts to spend directly from the universal Base Account’s balance.
- User control: Users can manage all their sub accounts at account.base.app.
If you would like to see a live demo of Sub Accounts in action, check out our Sub Accounts Demo.
Installation
Install the Base Account SDK:Quickstart
The fastest way to adopt Sub Accounts is to setcreation to on-connect and defaultAccount to sub in the SDK configuration.
page.tsx
from parameter in your transaction request to be the universal account address. Spend Permissions will also be automatically requested for the Sub Account as your app needs them.
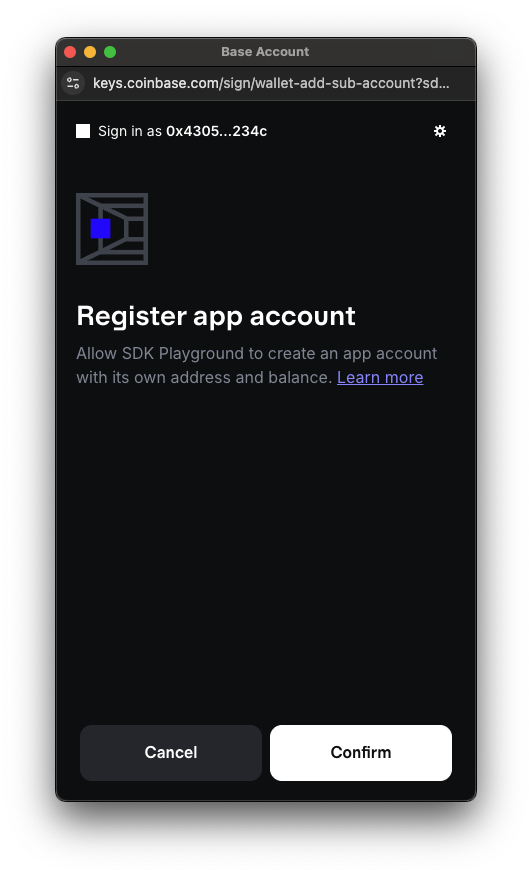
This is what the user will see when they connect their Base Account and automatic Sub Accounts are enabled:

Using Sub Accounts
Initialize the SDK
First, set up the Base Account SDK. Be sure to customize theappName and appLogoUrl to match your app as this will be displayed in the wallet connection popup and in the account.base.app dashboard. You can also customize the appChainIds to be the chains that your app supports.
page.tsx
Create a Sub Account
Create a Sub Account for your application using the provider’s wallet_addSubAccount RPC method. When nopublicKey parameter is provided, a non-extractable browser CryptoKey is generated and used to sign on behalf of the Sub Account.
page.tsx
page.tsx
Get Existing Sub Account
Retrieve an existing Sub Account using the provider’s wallet_getSubAccounts RPC method. This will return the Sub Account associated with the app’s domain and is useful to check if a Sub Account already exists for the user to determine if one needs to be created.page.tsx
page.tsx
Send transactions
To send transactions from the connected sub account you can use EIP-5792wallet_sendCalls or eth_sendTransaction. You need to specify the from parameter to be the sub account address.
First, get all the accounts that are available, of which the sub account will be the second account:
page.tsx
wallet_sendCalls
page.tsx
eth_sendTransaction
page.tsx
wallet_sendCalls in conjunction with a paymaster to ensure the best user experience. See the Paymasters guide for more information.
Advanced Usage
Import an existing account
If you already have a deployed Smart Contract Account and would like to turn it into a Sub Account of the connected Base Account, you can import it as a Sub Account using the provider RPC method:page.tsx
Before the Sub Account is imported, you will need to add the Base Account address as an owner of the Sub Account. This currently needs to be done manually
by calling the
addOwnerAddress or addOwnerPublicKey functions on the Smart Contract of the Sub Account that was imported and setting the Base Account address as the owner.Additionally, only Coinbase Smart Wallet contracts are currently supported for importing as a Sub Account into your Base Account.The Coinbase Smart Wallet contract ABI can be found on GitHub.Add Owner Account
Sub Accounts automatically detect when an ownership update is needed when a signature is required and will prompt the user to approve the update before signing. However, you can also add an owner to a Sub Account manually using the SDK convenience method:page.tsx
addOwnerAddress or addOwnerPublicKey functions on the Sub Account’s smart contract to add the owner.
Ownership changes are expected if the user signs in to your app on a new device or browser.Ensure you do not lose your app’s Sub Account signer keys when using the SDK on the server (e.g. Node.js) as updating the owner requires a signature from the user, which cannot be requested from server contexts.
Auto Spend Permissions
Auto Spend Permissions allows Sub Accounts to access funds from their parent Base Account when transaction balances are insufficient. This feature can also establish ongoing spend permissions, enabling future transactions to execute without user approval prompts, reducing friction in your app’s transaction flow. This feature is enabled by default when using Sub Accounts.How it works
First-time transaction flow: When a Sub Account attempts its first transaction, Base Account displays a popup for user approval. During this approval process, Base Account:- Automatically detects any missing tokens (native or ERC-20) needed for the transaction
- Requests a transfer of the required funds from the parent Base Account to the Sub Account to fulfill the current transaction
- Allows the user to optionally grant ongoing spend permissions for future transactions in that token
- First, attempt using existing Sub Account balances and granted spend permissions
- If insufficient, prompt the user to authorize additional transfers and/or spend permissions from their Base Account
Configuration
If your users’ Sub Accounts will be funded manually, you can disable Auto Spend Permissions by settingfunding to manual in your SDK configuration:
page.tsx
Technical Details
Base Account’s self-custodial design requires a user passkey prompt for each wallet interaction, such as transactions or message signing. While this ensures user awareness and approval of every wallet interaction, it can impact user experience in applications requiring frequent wallet interactions. To support Base Account with user experiences that need more developer control over wallet interactions, we’ve built Sub Accounts in conjunction with ERC-7895, a new wallet RPC for creating hierarchical relationships between wallet accounts. These Sub Accounts are linked to the end user’s Base Account through an onchain relationship. When combined with our Spend Permission feature, this creates a powerful foundation for provisioning and funding app accounts securely, while giving you ample control over building the user experience that makes the most sense for your application.Complete Integration Example
Here’s a full React component that demonstrates Sub Account creation and usage:page.tsx